Tis the season to eat a lot of meals, desserts and be merry!
Whether you’re hosting a Christmas party, wanting to put your baking skills to the test or treating everyone, we have you covered with an array of delicious dessert recipes that will bring a smile to everyone’s face.
Christmas Pudding isn’t the only dessert that has to be made over the festive period, and we have many tasty desserts you can choose from!
The Mince Pie Cheesecake (Courtsey of BAR + BLOCK)
Fan of both Mince Pies and Cheesecakes, then this is the dessert for you!
Ingredients
- 150g Digestive biscuits
- 75g Butter
- 900g Full fat cream cheese
- 200g Caster sugar
- 200ml Sour cream
- 45g Plain flour
- 2 Large Eggs
- 1 Egg Yolk
- ½ tbsp. Vanilla Essence
- 200g Mincemeat
Method
- Preheat the oven to 180C/350F/Gas 4.
- Grease and line the base of a 23cm/9in spring form cake tin.
- Place the biscuits in a plastic bag and crush with a rolling pin to fine crumbs.
- Melt the butter and add the biscuit crumbs, stir to combine. Place in the base of the cake tin and spread in an even layer, then flatten (use back of a spoon or a potato masher). (this will make a thin biscuit layer. For thicker, add another 50g of biscuits)
- Bake in the oven for 10 minutes until golden. Remove and leave to cool while you prepare the filling.
- Reduce the oven to 160C/315F/Gas 2.
- In a large bowl, beat together the cream cheese and sugar until smooth then add the sour cream and flour and beat again. Gradually add the eggs and vanilla essence beating well between each addition (beat in rather than whisk as you don’t want to incorporate too much air as this will affect the smooth surface of the cheesecake). Add mincemeat and mix well.
- Pour the cream cheese mix on to the biscuit base then bake in the oven for 45 minutes. The cheesecake should be just set with a slight wobble and should still be cream on top with just a slight golden hint around the edges.
- Once the cheesecake is cooked, turn off the oven and prop open the door so that it is slightly ajar and leave the cheesecake to cool in the oven – this prevents the top from cracking.
- Once the oven is cool you can remove the cheesecake to cool completely before removing from the tin.
Black Forest Gateau Roulade
If you’re a chocolate fan, then this Gateau should be your go to this season.
Ingredients
- 4 large eggs, separated
- 175g caster sugar
- caster sugar to dust
For the filling
- 170g blueberries
- 170g blackberries
- 90ml Belvoir Blueberry & Blackcurrant Cordial
- 30ml kirsch
- 300ml double cream
Method
- Preheat the oven to 180oC/Gas 4/Fan 165oC. Lightly oil a 33x23cm Swiss roll tin and line with baking parchment.
- Break the chocolate into cubes and place in a small heatproof bowl. Melt over a pan of hot water, stirring until smooth. Remove from the heat. In a large bowl, beat together the yolks and sugar until pale and thick, add the melted chocolate and beat until incorporated.
- In a separate bowl whisk the egg whites until they are stiff, but not dry. Stir a large spoonful into the chocolate mixture to loosen the mixture, then gently fold in the remainder. Pour in to the tin and bake for 15-20 minutes until just set.
- Place a tea towel on your work surface, top with greaseproof paper and sprinkle with caster sugar. When ready, remove the sponge from the oven and top it upside down onto the paper and peel off the paper from the cake. Then using the tea towel to help, loosely roll up the roulade, from the short side with the greaseproof layer inside and leave to cool.
- Meanwhile, put the fruit in a pan with the cordial and bring to a simmer and cook gently for 5 minutes until the fruit just starts to break down. Add the kirsch and leave to cool.
- Whip the cream until it forms soft peaks. Gently unroll the sponge and spread all over with the cream. Strain the fruit to remove most of the juice and scatter over the cream then roll up the roulade very carefully. Dust with icing sugar and serve.
White Chocolate and BerryWorld Cranberry Truffles
Smooth and delectable, the combination of sharp cranberries, creamy white chocolate and zesty orange make these a wonderful taste sensation that will leave your guests wanting more.
Ingredients
- 150g fresh cranberries
- 3 tbsp Cointreau
- 1 tsp granted orange zest
- 500g white chocolate, suitable for cooking
- 600g double cream
- 25g unsalted butter
Method
- Place the cranberries, Cointreau and orange zest into a small pan, bring to a simmer and cook until softened and syrupy. Leave to cool.
- Chop or break 300g of the chocolate into small pieces and put into a heatproof bowl. Place the cream and butter into a small saucepan, heat until just about to boil, pour over the chocolate and stir until melted. if the chocolate doesn’t melt with the heat of the cream, place over a saucepan of simmering water for a few minutes and stir until the chocolate has melted. Stir in the cranberries and leave to cool, then place in the fridge for 4 hours or overnight. With a small spoon or melon baller scoop a spoonful of the mix and roll into balls, then pop into the freezer for approximately 30 minutes. Melt the remaining chocolate in a bowl over simmering water. Place each ball on a fork and dip into the melted chocolate, swirling around until coated, place on a sheet of baking parchment, leave to set in the fridge. These delicious truffles are best served straight from the fridge.
- Cooks Tip: These lovely truffles make an ideal Christmas gift, place in little paper cases and then in a small gift box wrapped in ribbon, store in the fridge and eat within a week.
Mince Pies with Spiced Orange Crumble Topping
For a twist on a classic, these mince pies are topped with a light, crunchy crumble that’s packed with festive flavour.
Get well ahead and make a batch to pop in your freezer now, so they are ready to warm through on demand during the hectic Christmas period.

Ingredients
- 225g plain flour, plus extra for rolling
- 50g ground almonds
- 50g caster sugar
- 125g unsalted butter, chilled and diced
- 1 vanilla pod, seeds scraped out
- 1 egg yolk
- 800g fresh mincemeat
SPICED ORANGE CRUMBLE
75g plain flour
6 tbsp demerara sugar
60g unsalted butter
1 orange, zest
1 tsp mixed spice
Method
- For the pastry, put the flour, almonds, caster sugar, butter and vanilla seeds in a food processor and whizz to form crumbs. Add the egg yolk and 1 tbsp cold water. Pulse until it comes together to a dough, adding a drop more water if needed. Turn onto your worktop and gently knead until smooth. Wrap in cling film and chill for about 30 minutes.
- Before you wash the food processor, make the crumble topping. Briefly pulse together the fl our, demerara sugar, butter, orange zest and mixed spice to a chunky crumble mixture, then set aside.
- Preheat the oven to 200°C, gas mark 6. Roll out the chilled pastry to the thickness of a £1 coin on a lightly floured surface and cut out 24 rounds using an 8-9cm pastry cutter, re-rolling any trimmings. Press the rounds into the holes of 2 x 12-hole bun tins and lightly pinch the edges with your fingers for a fluted effect.
- Divide the mincemeat between the cases (about 1 heaped tbsp in each) and scatter the crumble over the tops. Bake for 15 minutes, or until golden and crunchy.
- Leave to cool in the tin for a few minutes before transferring to a wire rack. Once cooled, dust with icing sugar to serve, if liked, or freeze for up to 3 months. The pies can be reheated from frozen in a 200°C, gas mark 6, oven for 12-15 minutes.
Popcorn Candy Cane Bars
These sweet treats will be perfect to snack on whilst watching a Christmas movie!

Ingredients
- 100g Metcalfe’s cinema sweet popcorn
- 4 crushed candy canes
- 100g Chocolate beans (Christmas colours)
- 450g white chocolate
- 100ml double cream mixed with 2 tsp peppermint flavouring
- White chocolate and red gel colouring for decoration (optional)
- 4 Candy canes to decorate
Method
- Line a 20 x 30cm brownie tin with parchment and set to one side.
- Heat the cream & peppermint in the microwave but do not boil.
- Pour this over the white chocolate and stir until everything has melted – if the mixture is too thick heat a little in the microwave to loosen.
- In a bowl, combine the popcorn, crushed candy canes and half of the chocolate beans.
- Pour the melted chocolate over the popcorn and fold with a spatula ensuring everything is coated.
- Spoon the mixture into the lined tin and spread out evenly.
- Top the bar with the remaining chocolate beans, whole or crushed candy canes and drizzle with the red coloured chocolate.
- Allow to set in the fridge for an hour or two or overnight.
Once set, remove from the tin and wrap whole or divide into smaller bars and wrap, ribbon and tag for the perfect edible gift!
Prosecco-Infused Meringue Kisses
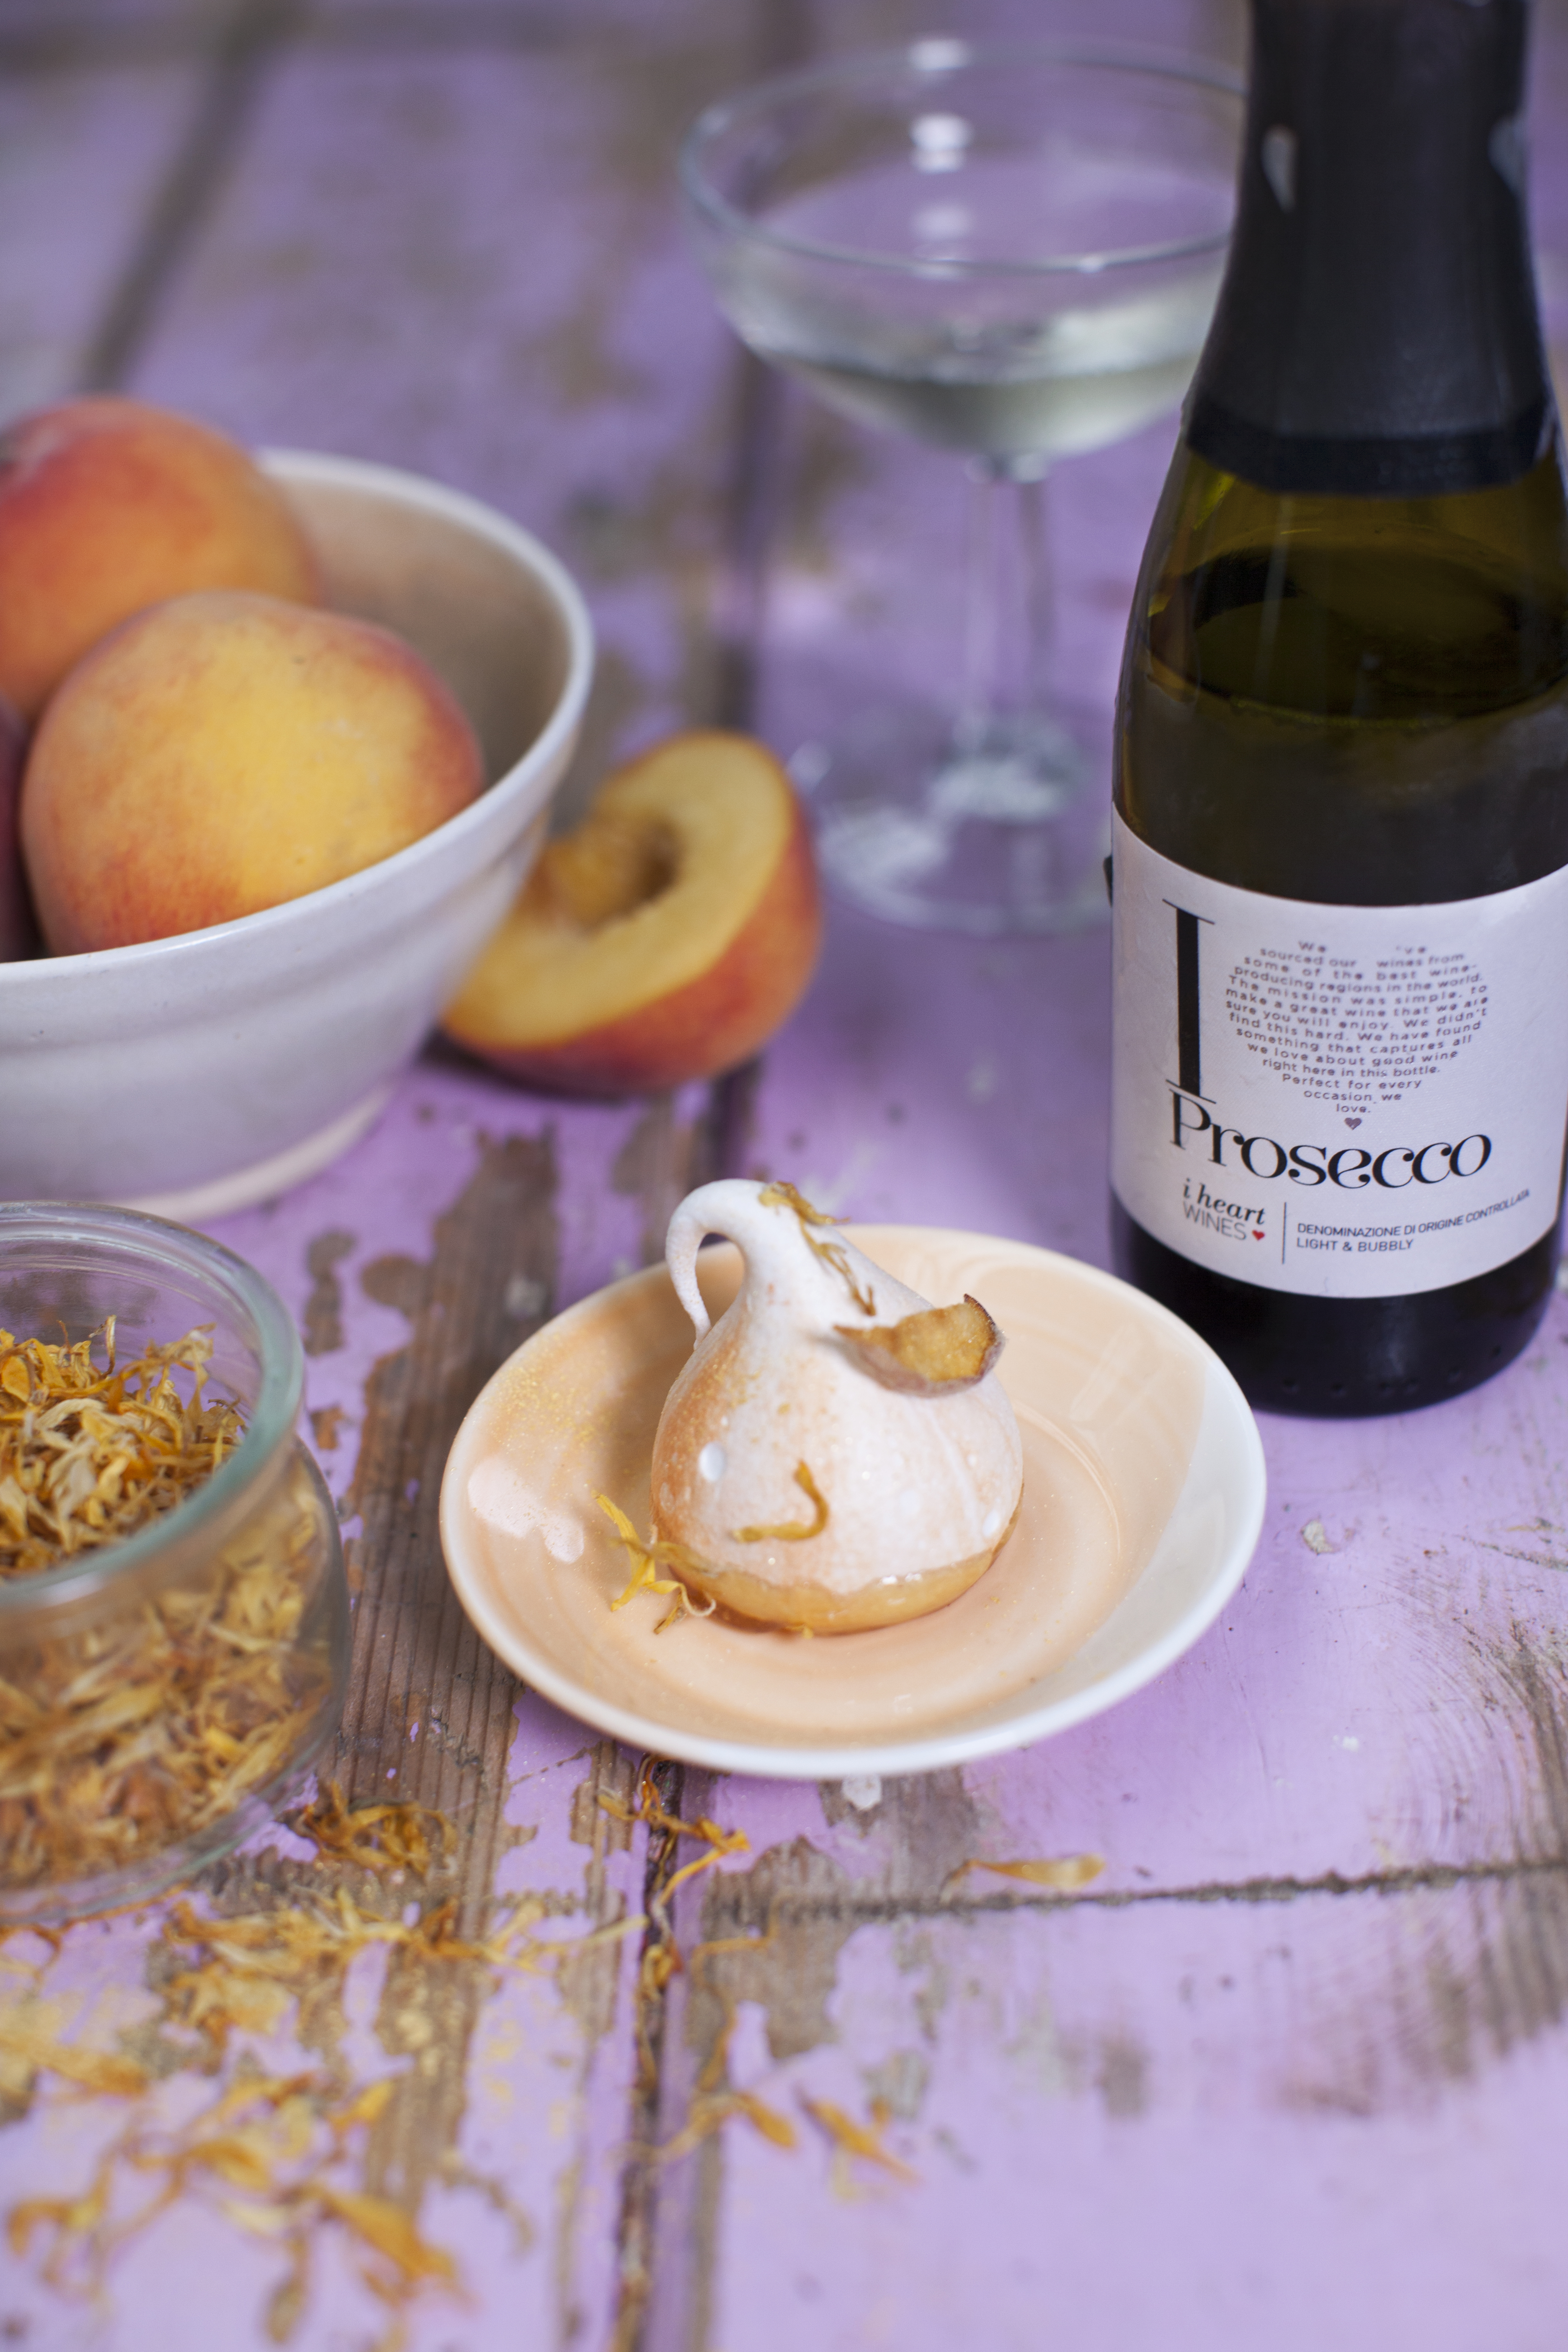
This recipe uses the very best of Prosecco, combining gorgeous acacia flower aromas, delicate apple and peach flavours with a touch of the all-important light sparkle.
Ingredients
For the Meringue
- 300g caster sugar
- 150g free range egg white
- Light peachy orange food colouring
- 4-5 drops natural apple essence
- 1 tsp citric acid Dried peach slices and marigold petals to garnish
- Gold shimmer spray
For the Caramel
- 100g sugar
- 1 tbsp i heart Prosecco
For the meringue mixture:
- Preheat your oven to 200°C. Line a baking tray with baking parchment, pour in the caster sugar and heat in oven for 7 minutes
- Pour egg whites into a mixer and whisk slowly, allowing small stabilising bubbles to form, then increase the speed until egg whites form stiff peaks
- Take the sugar out of the oven, and turn oven down to 100°C (leave door open to help speed this up)
- With your mixer on full speed, very slowly spoon the hot sugar into the beaten egg whites, making sure the mixture comes back up to stiff peaks after each addition of sugar. Once you have added all the sugar, continue to whisk on full speed until you have a smooth, stiff and glossy mixture
- You should continue to whisk for at least 5 minutes once sugar has incorporated. Feel the mixture between your fingers; if you can still feel the gritty sugar, keep whisking at full speed until it has dissolved and the mixture is smooth, stiff and glossy
To flavour:
6. Gently fold in 2 drops of natural apple essence and a teaspoon of citric acid. Gently fold it through the meringue, being careful not to deflate the mixture.
To colour:
7. Paint inside of piping bag with 4-5 spaced out stripes of peachy orange food colouring before adding the flavoured meringue mixture
To pipe:
8. Spoon your meringue mixture into the disposable piping bag and cut the tip off
9. Pipe out your kisses by keeping the bag tight, straight and directly above your baking tray. Squeeze from a 2cm height from the baking tray and then let go before pulling up to form peaks
10. Before baking, add a dried peach slice and dried marigold petals
11. Bake for 35-45 minutes or until the meringue bases come off the parchment paper clean
12. While the kisses are cooling make your caramel. Heat the sugar and the Prosecco in a saucepan over a medium heat until all sugar has dissolved and turns into a golden copper colour
13. Take off the heat and very carefully (while the caramel is still hot and runny) dip the bases of the kisses into the caramel. Place the kisses back on the parchment to cool and repeat for all kisses
14. Dust the kisses with some gold shimmer spray for ultimate sparkle.
Snowmen Emoji
Add some character to your festive food table, with these adorable cookies!

Ingredients
- 100g Lightly salted butter, softened
- 40g Caster sugar
- 2.5ml Dr. Oetker Madagascan Natural Vanilla Extract
- 1g Ground mixed spice
- 165g lain flour + extra for dusting
To decorate:
- 225g Dr. Oetker Regal-Ice
- Icing sugar to dust
- 20g Clear honey
- 25g each of Dr. Oetker Ready to Roll Regal-Ice Coloured: Black, Red, Green, Yellow and Blue
Method
- Preheat the oven to 190˚C (170˚C fan oven, 375˚F, gas 5). Line a large baking tray with baking parchment. In a bowl, beat the butter and sugar together until soft and creamy. Stir in the Vanilla Extract.
- Sift the flour and spice on top, and stir into the creamed mixture, then bring together with your hands to form a soft dough.
- Turn on to a lightly floured surface and knead gently until smooth. Roll out to a thickness of 1/2cm (1/4inch) – the mixture will be quite soft and short. Using a 6cm (2 ¼ inch) round cutter, stamp out 14 rounds, re-rolling the trimmings as necessary.
- Arrange on the baking tray, spaced slightly apart, prick the tops with a fork and chill for 30 minutes.
- Bake for about 15 minutes until lightly golden. Cool for 5 minutes then transfer to a wire rack to cool completely.
- To decorate, gently knead the Regal Ice for a few seconds to make more pliable. Lightly dust the work surface with icing sugar and roll out the Regal Ice to about the thickness of a £1 coin. Using the same cutter, stamp out 14 rounds, re-rolling the icing as necessary. Reserve the trimmings for the emoji features.
- Brush the tops of the cookies lightly with honey and place a Regal Ice disc on top. Gently smooth the disc of icing with your fingertips to create a professional finish.
8. Working on whichever colour of Ready to Roll you want to use first, knead it gently before using it to make the features shapes for the snowmen emojis. For eyes, break off tiny pieces and roll into balls, then press into place using your fingertips. Mouths can be made from tiny sausage shapes of icing and then curved and pressed on top of the iced cookie, or tiny balls of Black to make a more traditional snowman mouth. Roll tiny pieces of Blue icing into balls for tears. Use tiny pieces of reserved Regal Ice for teeth and score them lightly with a knife to add detail
- If you want to give the snowmen hats, use a piece of your favourite colour, roll out the icing thinly and then use the same round cutter to cut a circle. Trim the circle down into a crescent shape and stick on to the iced cookie using a little water. Add woolly texture by dotting with a skewer, and don’t forget a small ball of icing for the bobble!
- Once you’ve finished your decorating, leave the cookies for about an hour to dry a little before serving.

